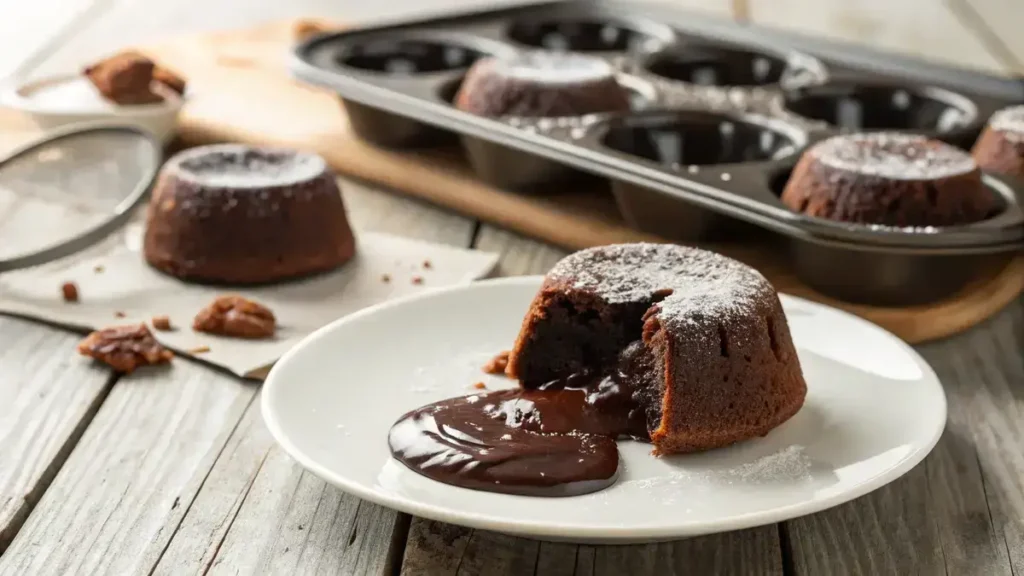
Imagine sinking your spoon into a warm, gooey lava cake, where rich dark chocolate flows like a sweet river! This easy recipe combines velvety chocolate chips and creamy milk, creating a luscious center that oozes with every bite. The cake itself is soft and fluffy, perfectly balanced with a hint of cocoa and a touch of vanilla. Topped with a scoop of vanilla ice cream and a drizzle of chocolate syrup, it’s a dessert that feels like a warm hug. Get ready to indulge in this spectacular treat that’s sure to impress your friends and family!
Table of Contents
Why You’ll Love This Recipe
- This lava cake is a chocolate lover’s dream come true!
- Trust me, you’re going to love the gooey, molten center.
- It’s super easy to whip up, perfect for any occasion.
- This one’s a game-changer for impressing your guests!
- Serve it warm with ice cream for an unforgettable treat.
Recipe Snapshot
| Feature | Details |
|---|---|
| Category | Dessert |
| Cuisine | French |
| Prep Time | 20 minutes |
| Cook Time | 8 minutes |
| Total Time | 28 minutes |
| Dietary | Vegetarian |
| Serves | 4 |
| Best Served | Warm with ice cream and syrup |
Ingredients
Get ready to indulge in a rich and gooey lava cake with these simple ingredients!
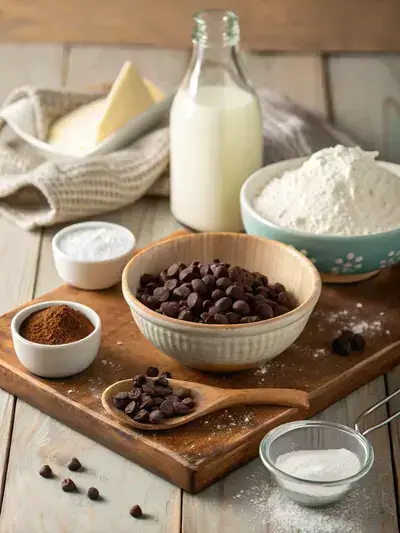
- ¾ cup dark chocolate chips – for the molten center
- 1 cup whole milk – to melt the chocolate
- ¾ cup + 2 tbsp powdered sugar – to sweeten
- ¼ cup + 1 tbsp unsweetened cocoa powder – for rich chocolate flavor
- ¾ tsp baking powder – to help the cake rise
- ¼ tsp baking soda – to enhance the cake’s texture
- 1 cup cake flour – the foundation of the cake
- ½ tsp kosher salt – to balance sweetness
- ½ cup vegetable oil – for moisture
- 1 tsp pure vanilla extract – to add depth of flavor
- vanilla ice cream – for serving
- chocolate syrup – for drizzling
How to Make the Recipe
Get ready to indulge in a warm, gooey lava cake that will impress everyone!
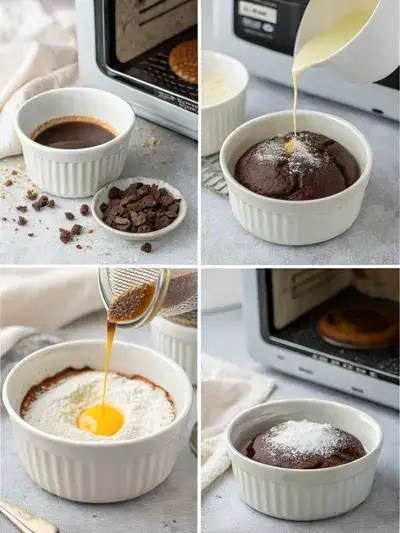
1. Heat the Milk
Heat milk in the microwave for 30 seconds. Pour it over the dark chocolate chips. Let it sit briefly, then stir until smooth. Chill in the refrigerator for 20 minutes.
2. Sift the Dry Ingredients
Sift together powdered sugar, cocoa powder, baking powder, and baking soda. Whisk in the cake flour and kosher salt until well combined.
3. Make the Batter
Add the chilled milk, vegetable oil, and pure vanilla extract to the dry ingredients. Mix until you have a smooth batter.
4. Fill the Cups
Fill each cake cup two-thirds full with batter. Scoop the chilled chocolate mixture into the center. Cover with more batter.
5. Cook the Cakes
Cover the pan and cook on medium heat for 5-7 minutes. Flip the cakes and cook for 1 minute more.
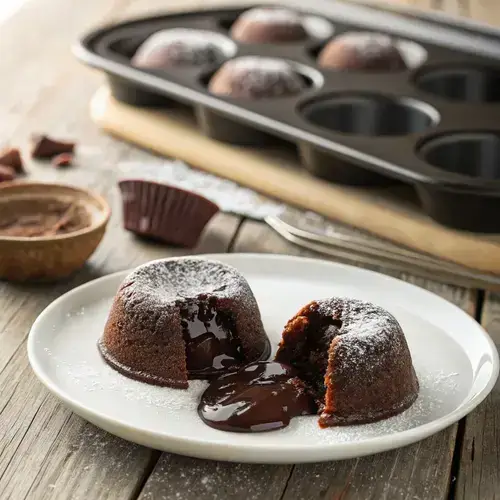
6. Serve and Enjoy
Serve topped with powdered sugar, chocolate syrup, and a scoop of vanilla ice cream. Enjoy your delicious lava cake!
Pro Tips for Making the Recipe
- Use high-quality chocolate chips for a richer flavor.
- Chill the chocolate mixture thoroughly for a gooey center.
- Don’t overfill the cups to allow for rising.
- Experiment with different toppings like berries or nuts.
- Serve immediately for the best lava effect.
How to Serve
- Serve warm for a gooey chocolate center.
- Top with a scoop of vanilla ice cream for a creamy contrast.
- Drizzle with chocolate syrup for extra indulgence.
- Add fresh berries for a fruity twist.
- Sprinkle with powdered sugar for a touch of elegance.
- Pair with a cup of coffee or hot chocolate for a cozy treat.
Make Ahead and Storage
You can make this cake ahead and store it easily:
Storing Leftovers
- Allow the lava cakes to cool completely.
- Store in an airtight container in the refrigerator.
- Consume within 2-3 days for best quality.
Freezing
- Wrap each cooled lava cake tightly in plastic wrap.
- Place wrapped cakes in a freezer-safe bag or container.
- Freeze for up to 2 months.
Reheating
- Thaw frozen lava cakes in the refrigerator overnight.
- Reheat in the microwave for 15-20 seconds.
- Check for warmth; avoid overheating to maintain the gooey center.
lava cake
Ingredients
Equipment
Method
- 1. Heat the Milk: Heat milk in the microwave for 30 seconds. Pour it over the dark chocolate chips. Let it sit briefly, then stir until smooth. Chill in the refrigerator for 20 minutes.
- 2. Sift the Dry Ingredients: Sift together powdered sugar, cocoa powder, baking powder, and baking soda. Whisk in the cake flour and kosher salt until well combined.
- 3. Make the Batter: Add the chilled milk, vegetable oil, and pure vanilla extract to the dry ingredients. Mix until you have a smooth batter.
- 4. Fill the Cups: Fill each cake cup two-thirds full with batter. Scoop the chilled chocolate mixture into the center. Cover with more batter.
- 5. Cook the Cakes: Cover the pan and cook on medium heat for 5-7 minutes. Flip the cakes and cook for 1 minute more.
- 6. Serve and Enjoy: Serve topped with powdered sugar, chocolate syrup, and a scoop of vanilla ice cream. Enjoy your delicious lava cake!
Notes
| Nutrient | Amount per Serving |
|---|---|
| Calories | 350 |
| Fat | 20g |
| Protein | 5g |
| Carbs | 40g |
You can visit our breakfast, lunch, dinner and desserts recipes from here:
Breakfast, Lunch, Dinner, Desserts
FAQs
Here’s a helpful FAQ about this recipe:
1. Can I use a different type of chocolate for the lava center?
Absolutely! You can use milk chocolate or even white chocolate if you prefer a sweeter flavor. Just keep in mind that the melting point may vary slightly, so adjust your heating time accordingly to ensure a smooth consistency.
2. What if I don’t have cake flour?
No worries! You can make a substitute by using all-purpose flour and removing 2 tablespoons for every cup. To mimic the texture of cake flour, you can also add a tablespoon of cornstarch to the all-purpose flour before measuring it out.
3. How can I tell when the lava cakes are done cooking?
The lava cakes should be firm on the outside but still slightly jiggly in the center. If you insert a toothpick, it should come out with some batter clinging to it, indicating that the center is still gooey and molten. Don’t overcook them to maintain that delicious lava effect!
4. Can I make the batter ahead of time?
Yes, you can prepare the batter in advance! Just store it in the refrigerator for up to 24 hours. When you’re ready to bake, let it sit at room temperature for about 15 minutes before filling the cups and cooking them. This will help ensure even baking.
Final Thoughts
Get ready to indulge in the warm, gooey goodness of this lava cake! It’s a delightful treat that’s surprisingly easy to whip up. Perfect for sharing or savoring solo, this dessert will surely bring a smile to your face. So grab your ingredients, channel your inner baker, and enjoy every delicious bite!